静态资源管理
静态资源一般指的就是图片,icons 和样式。
目录结构
├── assets
│   ├── icons/         // 存放 svg 图标
│   |── images/        // 存放图片
│ └── styles/ // 存放样式文件images:里面就按照分类放图片。icons:图标文件夹,放的全是 svgstyles:全局样式文件reset.less:初始化样式。(比如所有元素 padding: 0)varible.less:通用颜色变量common.less:通用 class。比如 clearfix,ellipsiselement.less:对 element plus 主题修改main.less:引入 tailwind 和以上 4 个样式文件
最后只需要在 main.ts 中引入 main.less 即可。
import "./assets/styles/main.less";基础颜色设计规范
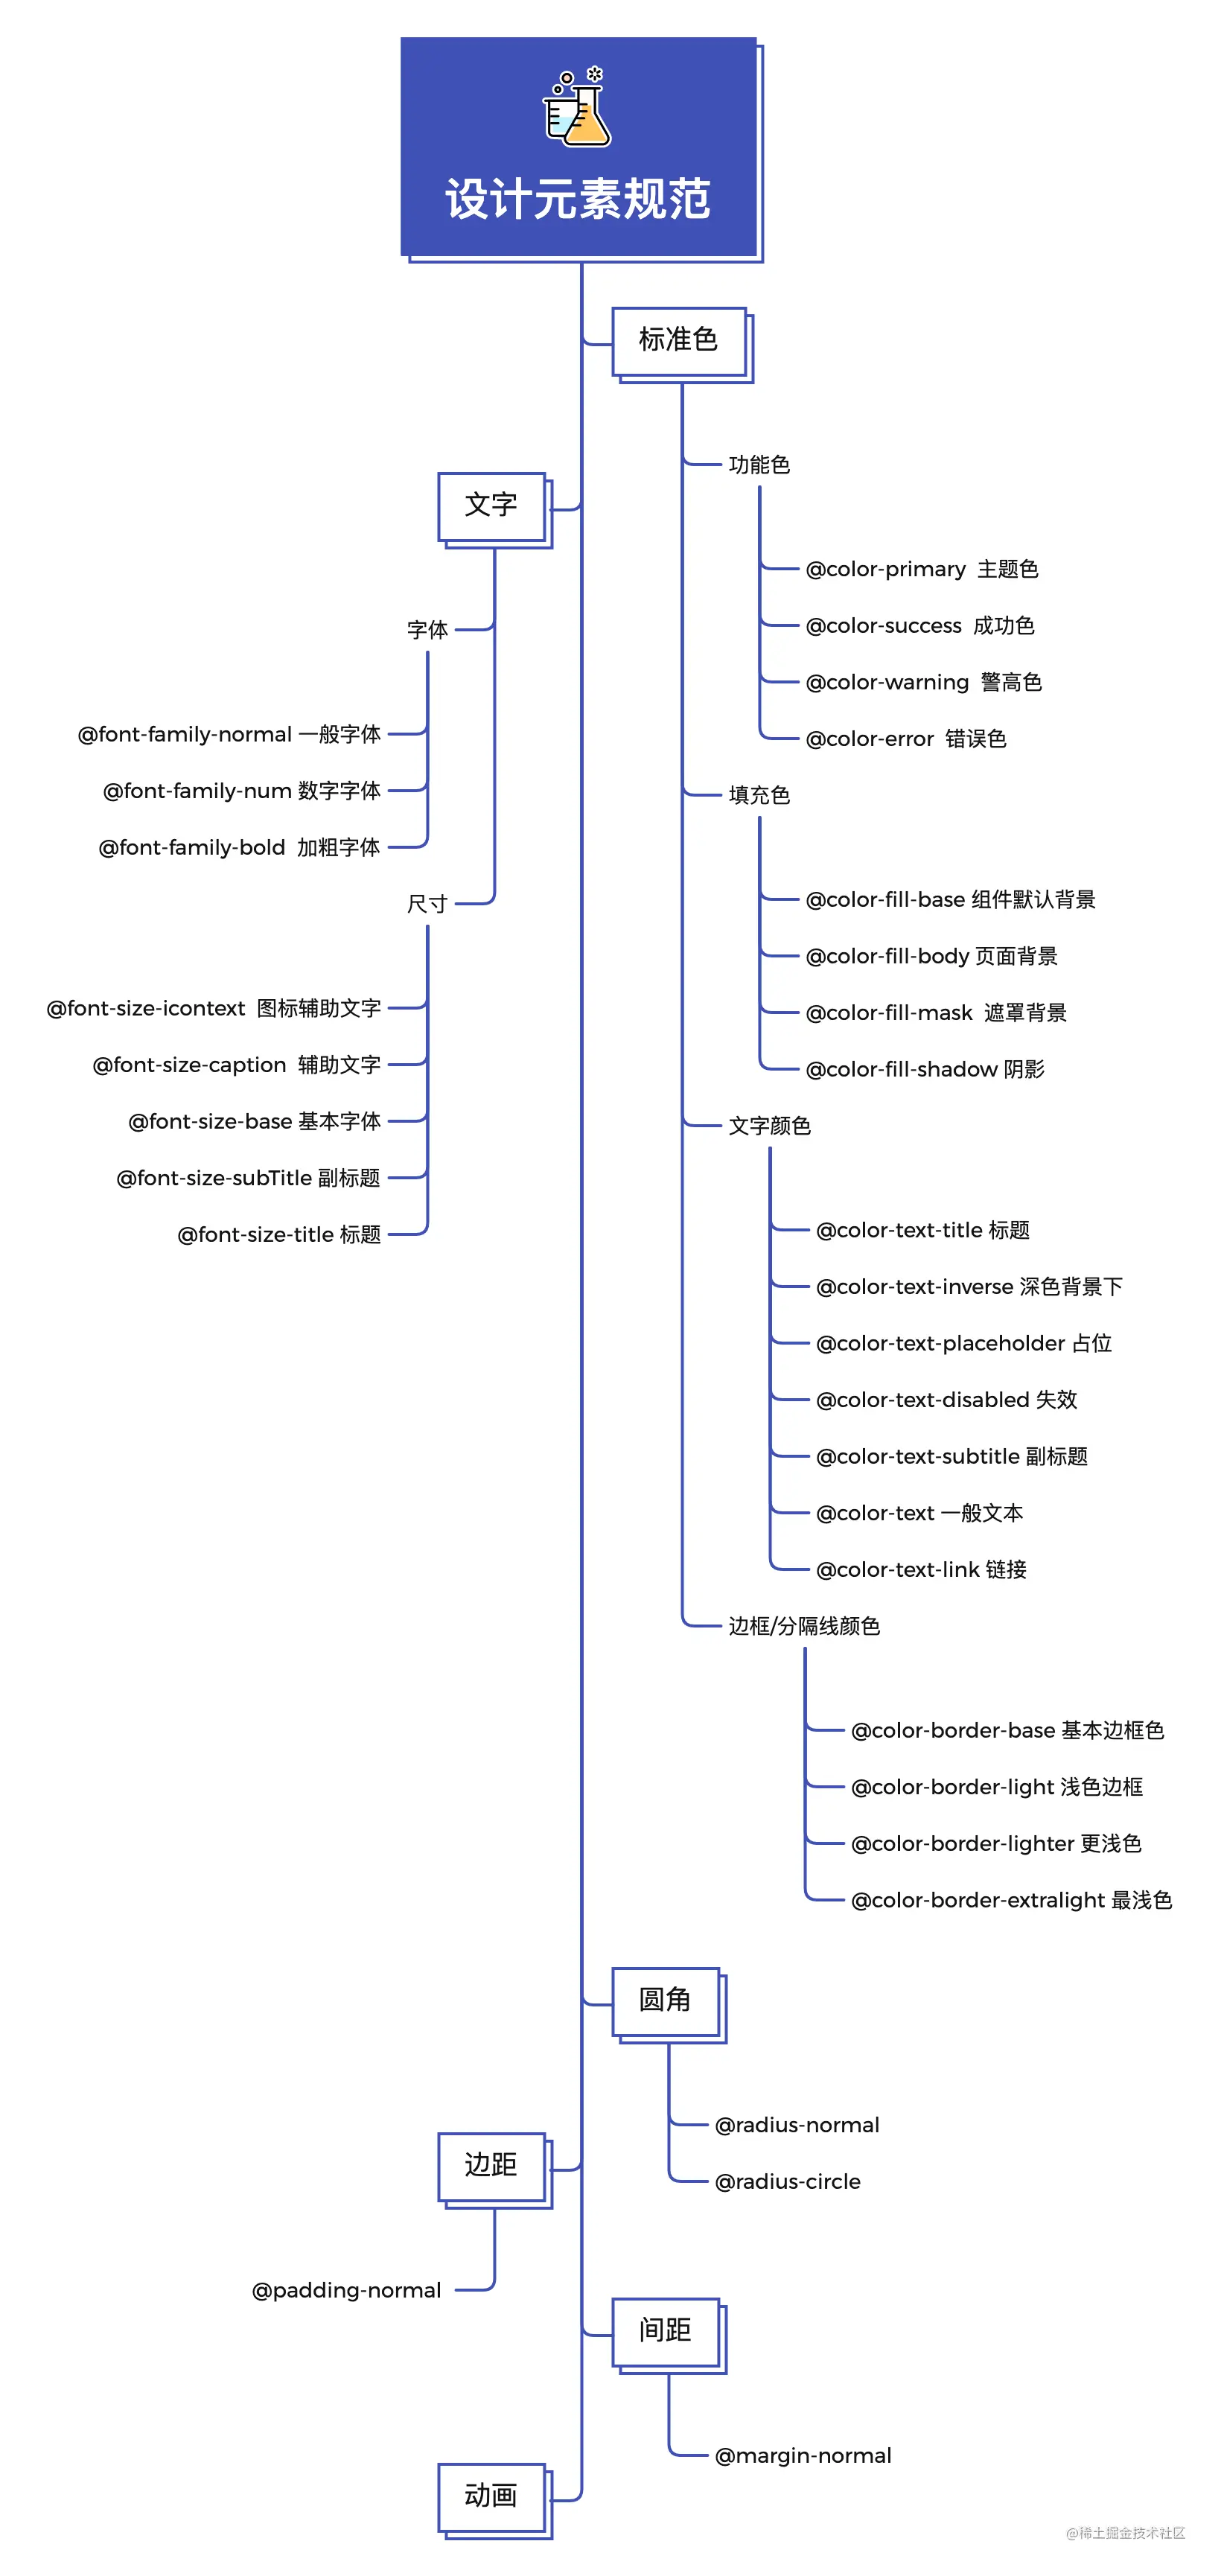
那么variable.less需要设计哪些颜色变量呢?
下面这个图可以作为参考:

配置全局 less 变量
由于variable.less中是全局的颜色变量,如果要在各个组件中使用的话,每次都需要单独引入,比较麻烦,所以我们需要做一些处理,使其变成全局的方式,那么就可以在各个组件中直接使用,而无需先引入该文件了。
// vite.config.ts
{
	//...
	css: {
	  preprocessorOptions: {
	    less: {
	      javascriptEnabled: true,
	      modifyVars: {},
	      additionalData: `@import "src/assets/styles/variable.less";`,
	    },
	  },
	},
	//...
}
svg 使用配置
svg 比 iconfont 优势:
- iconfont 在一倍屏幕下渲染效果并不好,在细节部分锯齿还是很明显的,SVG 上面我说过它是图形所以在浏览器中使用的是图形渲染,所以 SVG 却没有这种问题
- iconfont 只能支持单色
- iconfont 可读性不好,svg 自己可以微调,不需要重新设计
- svg 渲染性能更好
- svg 可以 tree shaking
参考:为什么要用 SVG?- svg 与 iconfont、图片多维度对比
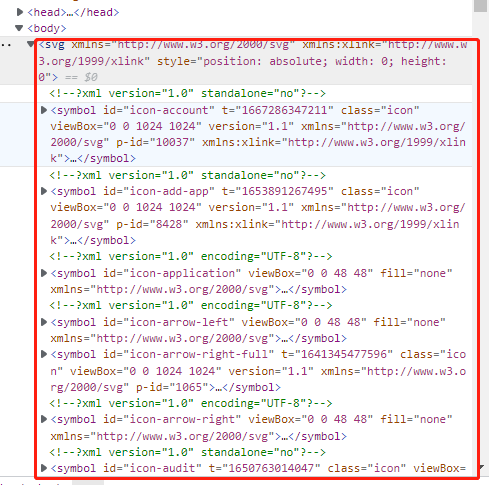
方案一:形成 svg 雪碧图
参考链接:
- https://0daybug.com/posts/7e0e72c3/index.html
- https://blog.csdn.net/weixin_45952652/article/details/116449330
优点:配置简单,使用方便
缺点:会将所有的 svg 打包到一起(svg 雪碧图),在加载的时候全部加载,而不是按需加载。

1、安装依赖
npm i vite-plugin-svg-icons -D2、vite 配置
// 生产svg精灵图
import { createSvgIconsPlugin } from "vite-plugin-svg-icons";

export default defineConfig(({ mode }) => {
  return {
    plugins: [
      // 生产svg精灵图
      createSvgIconsPlugin({
        // 配置路劲在你的src里的svg存放文件
        iconDirs: [path.resolve(process.cwd(), "src/assets/icons")],
        symbolId: "icon-[dir]-[name]",
      }),
    ],
  };
});
3、在 main.ts 中引入
import "virtual:svg-icons-register";4、新增 BaseIcon 组件
<script lang="ts" setup>
  import { computed } from "vue";

  interface IProps {
    // 图标名称,就是svg文件的名称
    name?: string;
    // 样式
    iconClass?: string;
    // 图标大小
    size?: string | number;
    //  图标颜色
    color?: string;
    // 线条的粗细
    strokeWidth?: string | number;
    // 颜色样式(如果传了color,以color为准)
    colorStyle?: "blue" | "green" | "orange" | "red" | "gray";
  }

  const props = withDefaults(defineProps<IProps>(), {
    size: 14,
    strokeWidth: 3,
  });

  // 图标名称
  const iconName = computed(() => "#icon-" + props.name);

  //  图标样式
  const iconStyle = computed(() => ({
    fontSize: typeof props.size === "string" ? props.size : `${props.size}px`,
    color: props.color,
  }));
</script>

<template>
  <svg
    class="base-icon"
    :class="[iconClass, colorStyle]"
    :style="iconStyle"
    aria-hidden="true"
  >
    <use :xlink:href="iconName" :stroke-width="strokeWidth"></use>
  </svg>
</template>

<style lang="less" scoped>
  .base-icon {
    display: inline-block;
    width: 1em;
    height: 1em;
    vertical-align: middle;
    overflow: hidden;
    fill: currentColor;
    stroke: currentColor;
    &.blue {
      color: @blue;
    }
    &.red {
      color: @red;
    }
    &.green {
      color: @green;
    }
    &.orange {
      color: @orange;
    }
    &.gray {
      color: @gray;
    }
  }
</style>
5、在组件中使用
<BaseIcon name="logo" :size="100" />方案二:svg 按需加载
优点:按需加载,减少体积和首页加载速度
缺点:配置麻烦,使用也麻烦
1、安装依赖
npm i unplugin-icons -D2、vite.config.ts 配置
// icon 相关
import Icons from "unplugin-icons/vite";
import IconsResolver from "unplugin-icons/resolver";
import Components from "unplugin-vue-components/vite";
import { FileSystemIconLoader } from "unplugin-icons/loaders";

const path = require("path");
const resolve = (dir: string) => path.resolve(process.cwd(), dir);

export default defineConfig(({ mode }) => {
  const config = {
    base: "./",
    plugins: [
      //...
      Icons({
        compiler: "vue3", // vue2, vue3, jsx
        customCollections: {
          custom: FileSystemIconLoader(resolve("src/assets/icons")),
        },
      }),
      Components({
        dts: true,
        resolvers: [
          ElementPlusResolver(),
          IconsResolver({
            prefix: "icon", // 使用时名称前缀
            customCollections: ["custom"], // 对应上面customCollections的custom
          }),
        ],
      }),
      //...
    ],
  };
  return config;
});
3、BaseIcon 组件的封装
BaseIcon 很简单,就是简单包了一层显示 style 而已
<script lang="ts" setup>
  import { computed } from "vue";
  import type { CSSProperties } from "vue";

  interface IProps {
    // 图标大小
    size?: string | number;
    //  图标颜色
    color?: string;
    // 是否旋转
    spin?: boolean;
    // 线条的粗细(1.先去掉svg图标代码中自身固定的strokeWidth,2.设置之后需要重启项目才有效果)
    strokeWidth?: string | number;
    // 旋转角度
    rotate?: number;
  }

  const props = withDefaults(defineProps<IProps>(), {
    size: 14,
    strokeWidth: 4,
  });

  const iconStyle = computed<CSSProperties>(() => ({
    fontSize: typeof props.size === "string" ? props.size : `${props.size}px`,
    color: props.color,
    strokeWidth: props.strokeWidth,
    transform: `rotateZ(${props.rotate}deg)`,
  }));
</script>

<template>
  <i class="base-icon" :class="{ spin }" :style="iconStyle">
    <slot></slot>
  </i>
</template>

<style lang="less">
  .base-icon {
    display: inline-flex;
    justify-content: center;
    align-items: center;
    height: 1em;
    width: 1em;
    fill: currentColor;
    stroke: currentColor;

    &.spin {
      animation: spinning 2s cubic-bezier(0, 0, 1, 1) infinite;
    }

    svg {
      height: 1em;
      width: 1em;
    }
  }

  @keyframes spinning {
    0% {
      transform: rotateZ(0deg);
    }
    100% {
      transform: rotateZ(360deg);
    }
  }
</style>
3、页面使用
简单使用:
IconCustomAvatarUser :前缀 icon,自定义 Custom,AvatarUser 对应的就是 avater-user.svg 文件
<BaseIcon :size="24" color="#0096ff">
  <IconCustomAvatarUser />
  <!--或者-->
  <icon-custom-avatar-user />
</BaseIcon>
动态 icon 使用:
<!--动态icon使用方式-->
<script setup>
  import IconHome from "~icons/custom/home";
  import IconSystem from "~icons/custom/manager";
  import servicePublishes from "~icons/custom/servicePublishes";
  const IconMap = {
    home: IconHome,
    system: IconSystem,
    servicePublishes: servicePublishes,
  };
</script>

<el-sub-menu v-if="config.children" :index="String(config.id)">
  <template #title>
    <BaseIcon v-if="config.icon">
      <component :is="IconMap[config.icon!]"></component>
    </BaseIcon>
    <span class="ml-2">{{ config.name }}</span>
  </template>
</el-sub-menu>
图片上 CDN
问题:目前图片是在
assets/images目录下的,如何上传到 cdn 的?
解答:在 public 目录下新增 cdn 目录,然后拷贝一份 assets/images 到 public/cdn 目录,在 build 部署时,提取 cdn 目录到云服务器上即可。
问题:为什么要拷贝一份
assets/images到public/cdn目录?
解答:因为在 build 打包后,只有 public 目录下的文件路径是不变的,其他的都加了 hash。
上 cdn 后怎么使用
前端使用一个函数,先判断是否上 cdn,来决定返回本地的图片 url 或者 cdn 上的地址。
在 /utils/cdn.ts 中进行配置:
// domain.ts文件
const isCDN = false; // 静态资源是否上CDN
const CDNUrl = "http://res.xxx.com";
const nodeEnv = process.env. NODE_ENV || "development";
// 如果项目需要上CDN,需要将图片放在public/cdn/images目录下
export const getImageSrc = (path) => {
if (nodeEnv === "development" || isCDN === false) {
// 注意,此方式不支持SSR
return new URL(`../assets/images/${path}`, import.meta.url).href;
} else {
return `${CDNUrl}/xxx/${path}`;
}
};最后将 getImageSrc 函数挂载到全局 window 对象上。
在项目中使用的时候,从原 import 方式,改为调用函数获取:
const loginBg = window.$getImageSrc("login.jpg");

<div class="login" :style="{ backgroundImage: `url(${loginBg})` }"></div>
需要在 main.ts 中将 $getImageSrc 注入 window:
import { getImageSrc } from "@/utils/cdn";
window.$getImageSrc = getImageSrc;
还需要在 env.d.ts 中声明 $getImageSrc:
/// <reference types="vite/client" />
declare interface Window {
  //...
  $getImageSrc: typeof import("@/utils/cdn")["getImageSrc"];
}
另一种方式
- 构建时依据环境变量,将
HTML中的静态资源地址加上CDN域名。
采用 Webpack-HTML-Plugin 等插件,将编译好的带 hash + publicPath 的静态资源插入到 HTML 中。
按环境动态构造 publicPath,设置 webpack 配置:
// webpack.config.js
const CDN_HOST = process.env. CDN_HOST; // CDN 域名
const CDN_PATH = process.env. CDN_PATH; // CDN 路径
const ENV = process.env. ENV; // 当前的环境等等
const VERSION = process.env. VERSION; // 当前发布的版本
// 这里动态构造的 publicPath 里,严格的将产物按环境 + 发布版本做了隔离 & 收敛。
const getPublicPath = () => {
// Some code here
return `${CDN_HOST}/${CDN_PATH}/${ENV}/`; // 依据 ENV 等动态构造 publicPath
};
const publicPath =
process.env. NODE_ENV === "production" ? getPublicPath() : ".";
module.exports = {
output: {
filename: "bundle.[name][contenthash:8].js",
publicPath,
},
plugins: [new HtmlWebpackPlugin()],
};- 构建完成后将静态资源上传到 CDN 。
前端在 Build 完成后,可以通过以下几种方式将静态资源上传到 CDN 服务器:
手动上传:前端可以手动将 build 好的静态资源通过 FTP 或者其他方式上传到 CDN 服务器,但是这种方式比较繁琐,需要耗费大量时间和精力,并且容易出现错误。
自动化上传:前端可以使用一些工具和插件,在构建完成后自动将静态资源上传至 CDN 服务器,例如 webpack 插件:cdn-webpack-plugin、upload-to-qiniu-webpack-plugin、oss-webpack-plugin 等,这些插件可以同时支持多个 CDN 商,使得上传操作更加方便快捷。
再比如在 vite 下,以下是一些可以使用的插件:
- Vite-plugin-ali-oss:阿里云 OSS 的插件,可以将文件上传到 OSS 并根据需要配置 CDN;
- Vite-plugin-qiniu:七牛云的插件,可以将文件上传到七牛云,并在项目中引用同步更新后的资源;
- Vite-plugin-qcloud-cos:腾讯云 COS 的插件,可以将文件上传到 COS 并提供一个 URL,访问时会经过 CDN 加速;
- Vite-plugin-s3:亚马逊 AWS S3 的插件,将文件上传到 S3 存储桶,并提供经过 CDN 加速的 URL。
使用这些插件需要在项目中加入对应的依赖,并按照插件文档进行配置,上传静态资源文件时,插件需要指定文件目录和文件类型等参数,以便于插件自动上传至 CDN 平台。
- 设置 nginx 反向代理 将静态资源部署到 CDN 上后,再将 Nginx 上的流量转发到 CDN 上。
 前端队长の博客